If you are here for the step by step build from my booklet, then read further. What booklet you ask? Please read the whole guide to get an overview, before you start with anything! The patterns here are nose 1 and nose 2.Cut your patterns out and prepare the craft foam and Worbla pieces for it. For this part use cheek 1 and cheek 2.
 Here comes the jaw pattern.
 If the nose is too big for your taste, reheat it and squeeze it together.Try to fit the patterns for your helmet as you please.
 Working out the raw form of the helmet. I used plastic strips and stuck them together with Worbla. You don\’t have a pattern there, just cut straight pieces like shown below.
 Add pattern cheek 3 and cheek 4. Adjust the patterns if you need to.
  Here comes eye 1 and eye 2.
 Now the pieces in the back: head side 1 and head side 2.
 Cut the forehead pattern and stick it right there.
  Use the patterns head 1 and head 2 and stick them to the back.
 Both ear base 1 and ear base 2 go next to the eyes.Then shape ear 1 and ear 2. Pay attention to what side points out.
 Patterns rim 1 and rim 2 go to the back. Stick the two pieces together in the back.
 You\’re done with the Worbla build for now. But prepare the half moon pattern.Now onto the sculpt with Apoxie Sculpt or any other modelling clay you like.The goal is to cover all the holes with Apoxie Sculpt, to get a smooth surface.
 If you paid attention: I built the helmet in a way, that I can cover all the Worbla seams with Apoxie without using too much of it. If you need more Apoxie, go ahead.
 Fill the ears woth some Worbla scraps to save Apoxie Sculpt.
 And then cover it with Apoxie Sculpt and smooth it out.
 Here’s the half moon pattern. Cut it out and cover it with Worbla.
 And your build is almost done! Cover up open edges with Worbla or Apoxie Sculpt. Keep the sculpt clean.
 Primered and spray painted.
 After I spray painted and weathered the helmet.
 I bought synthetic extensions for the helmet hair in 2 different colors. Glued them together to get an even mix and cut and glued them onto the helmet.
 The hair-ends I cut with thinning shears.
 Here are the leftovers…
 The hair will be styled later to get the spiky effect as seen ingame.

When building the armor I split the chest piece into 3 layers. Like that I don’t need to work with huge Worbla pieces at once.

 This is going to be the back piece.
 Starting with the details.


 Trying a new technique here using Worbla’s Deco Art Pellets. The stuff comes as white pellets. I heat them with a hot air gun, because I just don’t like to work with water as it says in the description. The pellets work much better ands stick great to Worbla. Better than using Apoxie Sculpt, but I find it a bit harder to shape compared to Apoxie. It’s like working with wax from a candle…
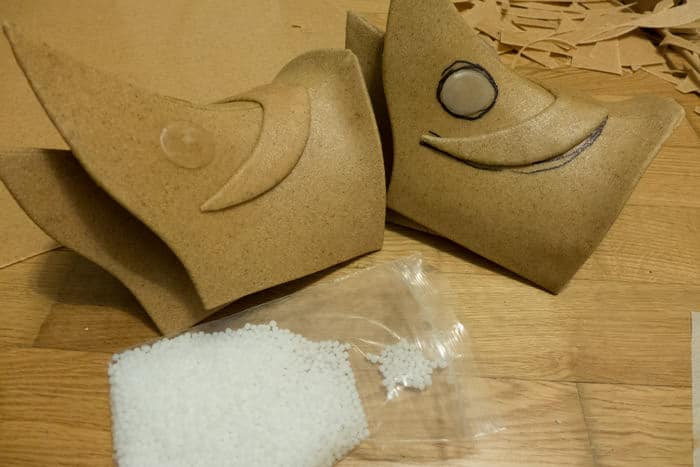
 Using a small cup to keep the pellets from flying away…

 The get all soft and clear when heated.

 You’ll know if the pellets are cooled down when they get all white again.The material binds very well with Worbla. I’m sure it’ll survive any fall.

 Primering and painting all the parts now.


 Leather glueg onto craft foam to get a thick piece of leather.
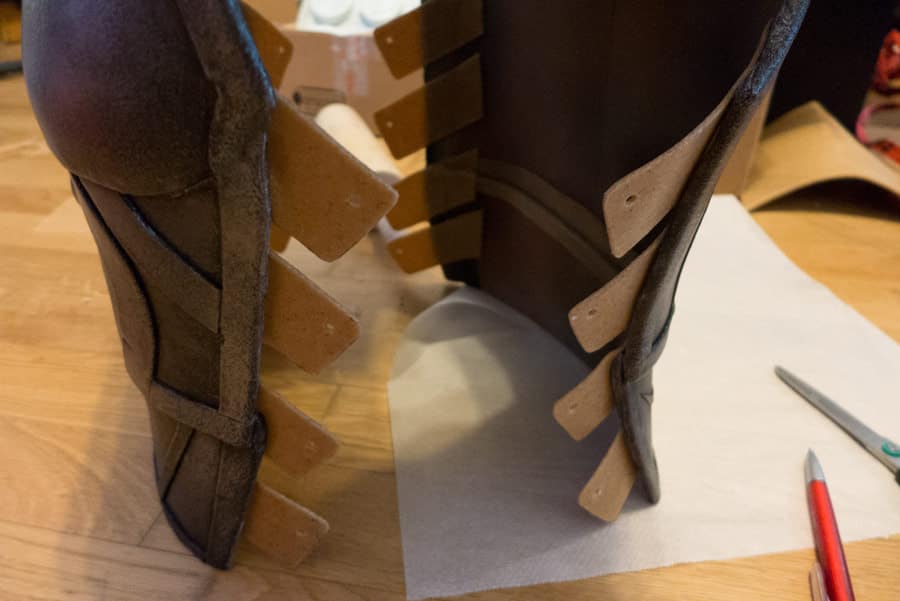
 Doing the bracers here.
 I was only a few seconds away…

 Now going to sew the Khajiiti sandals.
 Glueing everything on top of my foot, cutting it open, and the sewing the sandal later.
 And endless task so it seams…

 Here come the elbow and keen spikes.


